Free Tropical Runtz seeds on orders over $150!
Correctly drying and curing cannabis might be difficult, but it doesn’t have to be. With the correct expertise and tools, you may obtain the greatest outcomes for the bloom you’ve spent months cultivating. This guide will cover all you need to know about drying and curing cannabis, from the purpose of these procedures to the tips and tricks for getting the job done right.
Properly drying and curing your buds may release tasty and fragrant cannabis with greater potency than simply drying it. Making the effort to dry and cure your cannabis properly has several advantages:
In addition, you may enhance each advantage by adopting basic tactics such as adequate drying racks and containers and maintaining a regulated atmosphere. This extra step allows you access to tastier flowers with better potency levels while keeping them fresh for an extended time.
Curing cannabis flowers brings the plant’s full potential to life, changing it from a dried flower into a tasty and fragrant experience. Cannabis drying and curing are two distinct procedures that should not be confused. Removing moisture from the cannabis plant is part of the drying process. Freshly grown cannabis can have a moisture level of more than 70% by weight. This trapped moisture in the bloom is eliminated during the drying process. The water evaporates, leaving the cannabis flower dry and ready for storage or use. This drying procedure is critical for keeping potency.
Drying cannabis flowers entails maintaining the buds in a cool, low-humidity atmosphere for approximately a week. After your bloom has dried sufficiently, the curing process begins. It might take 2-3 weeks, depending on how much moisture remains in your buds. When finished, this curing procedure results in much-increased flavor and fragrance. If curing is done in addition to drying, potency is increased. With careful attention taken during all steps, you will have high-quality cannabis that will deliver a delightful smoking experience.
Creating the ideal environment for cannabis drying is critical to guaranteeing a high-quality end product. Choose a clean, secure, and simple location to regulate temperature, humidity, and light exposure. Basements, closets, and dedicated grow tents are ideal drying room locations.
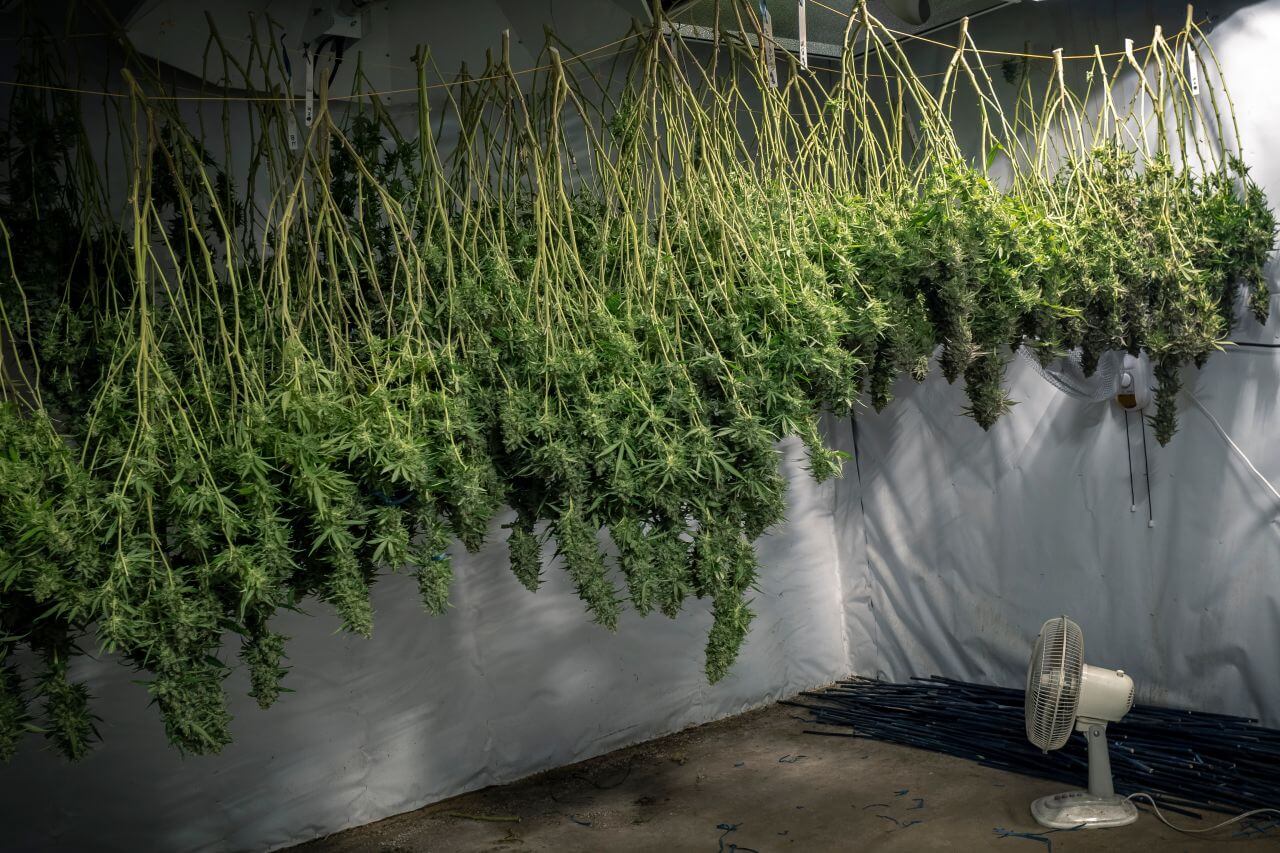
The amount of your crop will determine the size of your drying space; ensure adequate room for optimal air circulation and access for monitoring and modifications.
Drying cannabis flowers can take 5 to 15 days, depending on humidity and temperature. While drying, keep an eye on the surroundings or settings to ensure that all parameters, such as temperature and humidity, stay consistent. This will help your cannabis bud dry evenly and without problems. If temperatures drop too low or rise too high, mold or mildew may form on the bud’s exterior, causing issues. Furthermore, if there is too much moisture in the air, they may take longer than normal to dry out completely. You must monitor these factors during the drying process to achieve flawless results.
The hanging dry technique suspends individual branches upside down from a line, wire, or rack. This approach provides optimum ventilation and uniform drying because the buds are not in contact with surfaces. Follow these steps to dry your cannabis by hanging it:
To dry trim cannabis buds, you need to:
Maintaining low humidity levels throughout drying is crucial for protecting cannabis quality. Mold development might occur if moisture levels are too high, destroying your blooms. Controlling the humidity condition of your cannabis buds will guarantee that they retain their flavor and potency. The recommended relative humidity (RH) for cannabis drying is 45-55%. This will aid in preserving the terpenes and cannabinoids, contributing to their distinct taste character.
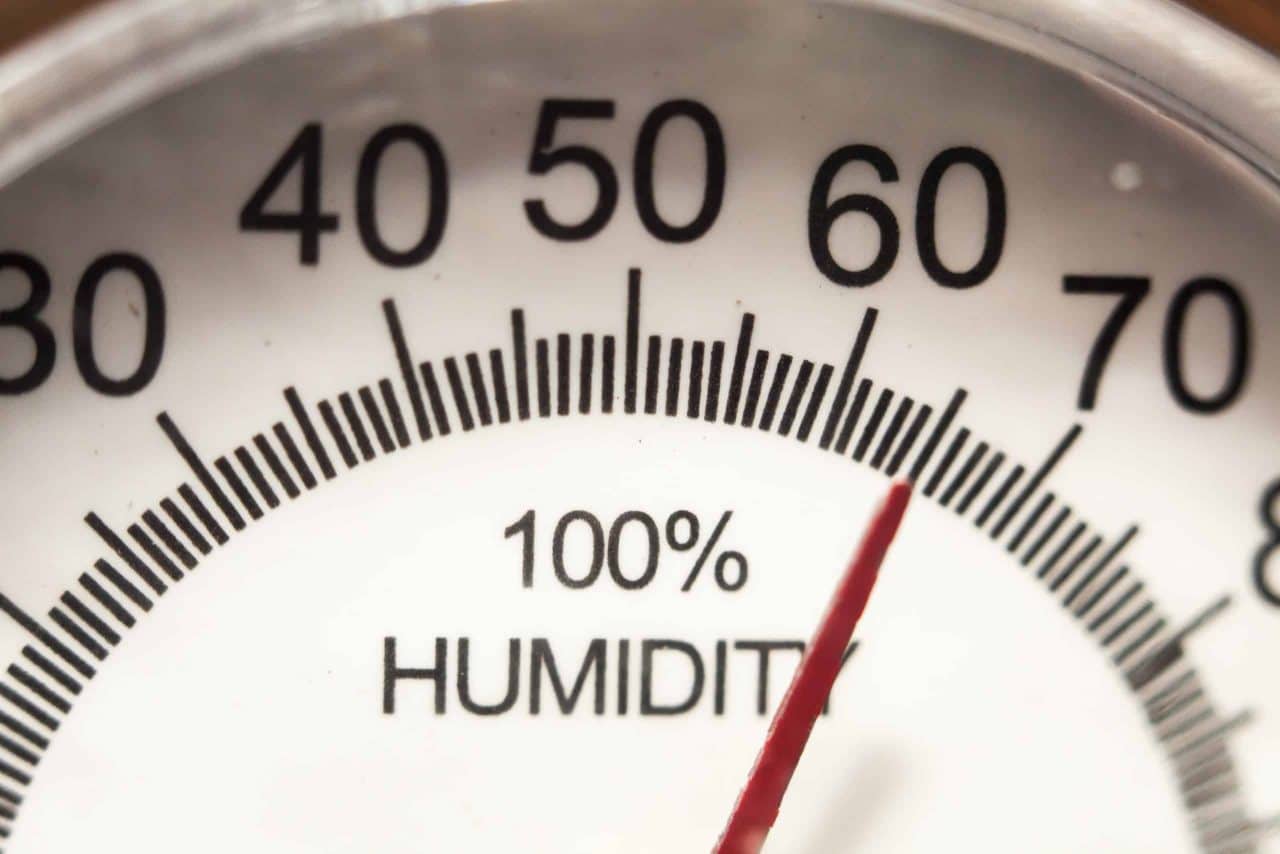
Additionally, it is critical to monitor RH levels using a hygrometer or digital device when drying cannabis. If there is too much moisture in the air, you can use a dehumidifier or other humidity-control tools, such as desiccant packs, to reduce the RH levels in the drying space. However, be cautious since overuse of dehumidifiers can remove too much moisture, leaving your bloom brittle and overdry.
Improper drying and curing can lead to mold and mildew, which can be harmful if consumed. Mold and mildew can grow during curing if there is too much moisture or insufficient ventilation. To address this problem:
It is critical to adjust the temperature of the drying atmosphere to guarantee that your cannabis is perfectly dried. The best temperature for drying cannabis is between 60 and 70°F. The potency and flavor may suffer if the temperature climbs over this range. Furthermore, drying cannabis too rapidly or at too high a temperature risks destroying its terpenes and other cannabinoids. The quality of your buds will suffer as a result.
Maintaining a steady and regulated temperature during the drying process ensures that all of the water content in your cannabis evaporates correctly without damaging its taste or potency. It’s also critical to maintain low humidity levels throughout this procedure; too much moisture can lead to mold development, which can spoil the entire batch. With adequate care and attention to detail, while managing the temperature and humidity of your drying environment, you may experience a flawless dry and cure every time.
You’ll need to “burp” your curing jars daily for the first week. This entails opening the jar to allow new air to enter and expel accumulated moisture. You can start burping the buds every few days after the first week. After the second week, experts recommend going once a week and then every few weeks after that. When the buds are dry to the touch but slightly damp on the inside, your cannabis has been thoroughly cured. Rather than bending, the stems should snap. Cannabis that has been properly cured will also have a distinct scent. If your plant smells like cut grass or hay, more curing time is required.
Here are a few factors to consider when deciding if your buds are adequately dried and ready for cannabis curing:
Curing is the process of carefully drying and curing harvested cannabis buds in controlled settings. The main benefits of curing weed are to:
Curing cannabis typically takes 2-4 weeks, with buds being stored in airtight containers and burped periodically to release excess moisture. There are several container options available for cannabis curing. The most common containers are glass jars and bamboo baskets. Here are some containers you can use to cure your cannabis effectively:
The main benefit of using a metal jar is that they are more durable and less prone to breakage when dropped. However, they rust over time.
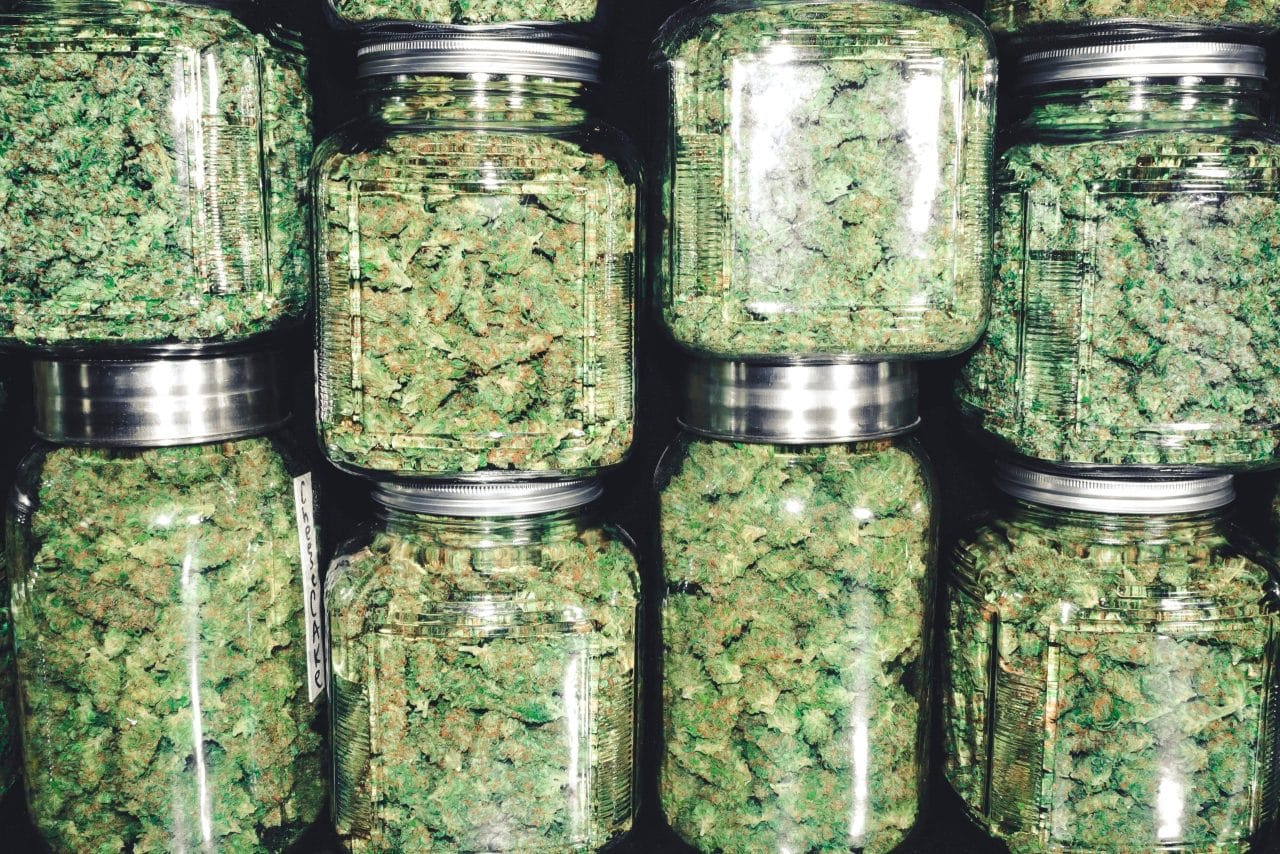
Growers are urged to check your metal jar regularly to ensure it is not rusting. It’s worth noting that titanium curing jars are the best since they don’t leak whatsoever, which means you won’t have to worry about the metal altering the smell or flavor of your cannabis. You can find out more about jar curing cannabis here.
Ziplock bags are airtight and available in a variety of sizes. The only disadvantage of using them is that they might be difficult to seal securely. To avoid any problems, use a high-quality zip lock bag. It should be noted that plastic is not advised for cannabis storage. If you keep your cannabis for an extended time, the plastic material may seep into it, affecting the smell and flavor. In other words, avoid using plastic materials for long-term weed storage.
During the curing process, keep the dried cannabis buds in an airtight container, such as a transparent or opaque turkey bag. The containers should be kept in a cold, dry, dark area to preserve the buds from heat and light, especially ultraviolet (UV) radiation, which can damage resin glands and cannabinoids. Once the containers are secured, the optimal temperature for curing cannabis is about 65°F, with the container maintaining a 50% RH level. During the first week of curing, the container or jar should be opened twice to three times daily to remove moisture and check for a sweet, slightly moist scent, indicating good curing. The slow-curing procedure can take up to 6 months or more, but after 2 to 3 weeks, the cannabis buds should be fully dried and ready for storage.
If you’re feeling experienced enough then water curing cannabis can be quite beneficial but comes with some risks.
Cannabis curing might take anything from two weeks to three months. If you want a faster cure, start monitoring your buds after two weeks. The buds will be less strong and flavorful but will suffice quickly. You can wait three months for a more conventional treatment. The buds will be more powerful and flavorful. You can even cure your cannabis for up to 6 months! The buds will be exceedingly powerful and flavorful. Curing for a long period is absolutely worth it if you have the patience.
It is critical to keep cannabis correctly after curing to retain its quality and freshness. Consider the following cannabis storing techniques:
Consider the following procedures to ensure cannabis quality during long-term storage:
Some of the most common mistakes growers often make that negatively impact the final product include:
Adding more heat will be ineffective if the air remains stagnant. Most perfect dark drying places don’t have adequate ventilation by design, so put in a fan to circulate that air. Ensure the fan is not aimed directly at the buds to minimize uneven drying. Again, a timer may help you save money on electricity. If you’re drying and curing in a hot, dry area with little humidity, the challenge is to keep the buds from drying out too soon. In this case, avoid using a fan, keep the opening to the dry chamber closed, and after 2 to 3 days, place buds in a brown paper bag. Investing in a humidifier is also a smart option.
If you hang harvested weed in a very chilly or damp cannabis drying atmosphere, buds will inevitably not dry efficiently. The optimal drying temperature is between 15 and 20 degrees Celsius, with 30 and 50% humidity. If this is an underlying problem, consider bringing in more heat to help. As night temperatures change as fall progresses, a small heater in a modest setting, or a greenhouse heater, will raise the temperature of the dry room. To save money, set a timer – an enclosed place will retain heat for longer.
Drying the buds too much might result in a harsh, brittle, and flavorless end product. It’s critical to keep an eye on the drying process and remove the cannabis buds from the drying chamber or cabinet after reaching the desired moisture level. Conversely, if the cannabis buds aren’t thoroughly dried, they might develop mold and become unsalvageable. Before the curing process, the buds must be dried to the proper moisture level. Refrain from speeding through the drying process!
For many home gardeners, time is a luxury. The harvest occurs when the buds are most needed, not including the extra month required to cure correctly. However, patience will reward you with the greatest tasting and most potent cannabis buds, and if you can control your impulses until the curing process is completely done, the wait will be worth it!
When drying cannabis or curing bud, everyone knows the method of breaking the stem, and if it breaks, the bud is dry; however, it can sometimes provide a deceptive impression. Some buds are large, while others are tiny, dense, and slender. Unless you shatter every stem, you may mix damp and dry buds in the container. Excess moisture in the jar, as well as ambient temperature, can affect the other buds. If the buds in your jar don’t look dry after a day or two, take them out for extra drying; placing them in brown paper bags in a warm place will do the work and remove that excess moisture! Ensure to ‘burp’ or use humidity control pouches in your airtight jars.
You may take numerous steps to guarantee that your cannabis properly dries and cures. Here are a few pointers growers have used throughout the years to help them get it right:
Offers
This product is not for use by or sale to persons under the age of 18. This product should be used only as directed on the label. It should not be used if you are pregnant or nursing. Consult with a physician before use if you have a serious medical condition or use prescription medications. A doctor’s advice should be sought before using any hemp products. All trademarks and copyrights are property of their respective owners and not affiliated with nor do they endorse this product. These statements have not been evaluated by the FDA. This product is not intended to diagnose, treat, cure or prevent any disease. By using this site you agree to follow the Privacy Policy and all Terms & Conditions printed on this site. All products contain less than 0.3% Cannabinoid-compliant with applicable Federal Laws. Please make yourself aware of any and all applicable laws regarding hemp in your jurisdiction. Premium Cultivars accepts no liability or responsibility regarding germination laws in any specific locale state or national jurisdictions.THCA products are not available for shipment to the following states: Hawaii, Idaho, Minnesota, Oregon, Rhode Island, Utah, Vermont *Note: Products with Total THC content above 0.3% must not be shipped to these states.
We want to help you get your hands on the seeds you want, take 20% off your next purchase when you enter your email below!
We want to help you get your hands on the seeds you want, take 20% off your next purchase when you enter your email below!