Free Tropical Runtz seeds on orders over $150!
Cannabis cultivation is many things to many people. A hobby, a passion, a career, a business, a lifestyle – and for some, a necessity. And while the range of reasoning behind why people decide to grow their own weed is multi-layered (as are the cultivation techniques and styles on offer), one of the very first disciplines that most new growers are exposed to is… plant training.
Whatever cannabis cultivation is to you, one thing remains constant: the desire of all upstanding weed producers for a better yield size with higher-quality buds. And one of the most straightforward, easiest ways to give your crop the very best chance of increasing the final yield weight while at the same time boosting trichome output is to impart some controlled stress onto the plants.
This can be achieved in a huge number of ways. If you are looking for a broader plant training guide and the mistakes that need to be understood and avoided, check out our full blog post right here
The training method we are going to focus our attention on this afternoon (or whatever time it is there) is the Sirius Limbo Training Technique. This is a combination of three of the most commonly used stress training methods all rolled into one, and the results truly do speak for themselves. All three techniques are easy to learn and implement, and by combining them into one training technique you are all but guaranteeing a significant boost to your harvest in both weight and potency.
But, before we dive headfirst into the Sirius Limbo Training Technique, let’s have a quick run-through of how stress training works in general, and why every ganga grower should be looking into implementing a stress training routine – no matter your level of expertise, or the conditions you are growing the crop in.
Cannabis stress training involves placing controlled physical (and sometimes environmental) stresses on the plant in order to control its growth patterns. The idea behind it is simple: by forcing the plant to focus its energy and resources on a particular area of the plant structure, or by manipulating the shape of the plant itself, you can reach the desired yield and potency outcome of a particular cultivar.

Cannabis stress training is split into two main categories – High-Stress Training (HST), and Low-Stress Training (LST).
As the name suggests, HST techniques involve subjecting the plants to high levels of stress, strain, manipulation, or even deliberate damage. It may seem a little counter-intuitive, but by inflicting certain controlled levels of stress, we can improve the robustness of the structure of the plant, which can lead to more budding sites with increased flower density and size.
HST methods include –
HST techniques do come with some risks though and are not suitable for all strain types. Autoflowering plants come with a range of benefits (such as faster flowering times and overall growth patterns). Still, unless you have a high level of understanding and experience with a particular autoflowering strain, we do not usually recommend using HST techniques. They just don’t have the vegetative growth time to bounce back from the heavy stress, and the stunt in growth that is a common result of HST.
Unlike the heavy manipulation of HST methods, LST techniques involve a more gentle guiding and pruning of the plants. This is achieved with certain tools such as trellis, netting, and even a simple length of twine.
By slowly and carefully directing the growth pattern, we can break the Apical dominant (think Christmas tree) shape, and open the canopy right up. This allows for a more even spread of the growth hormones and nutrients to all the budding sites, and also massively boosts the light penetration and airflow throughout the canopy.
LST methods include –
LST techniques can be used with all strain types and can be used hand-in-hand with HST techniques.
Ok, so now that’s outta the way, we can get onto the matter at hand – the Sirius Limbo training technique. As we mentioned above, this is a combination of three of the most commonly employed training methods all rolled into one package –
The limbo part should be pretty obvious, the Sirius part maybe not so much.
We all know what the limbo game is, yeah?
If not, it’s that fan favorite where you have to bend backward at the hips and knees to shimmy under a pole.
Yeah, well that’s what we are essentially trying to achieve with our plants. There’s no actual pole involved in our game of cultivation limbo, but if you use that imagination of yours and pretend there is a physical pole hovering over the canopy, you will start to get the idea.
But why?
It’s simple really. We talked about spreading and opening up the canopy for more effective light penetration and airflow (as well as a more even distribution of the growth hormones and nutrients), but there is another factor that needs to be considered – for indoor growers, anyway.
The distance from the light to the canopy is a pretty important factor in a successful indoor grow. This distance is dependent on the light fixture /growing-basics/comparing-cannabis-grow-lights/ you are using, but in this brave new world of cannabis legalization and the improvements in technology that come with it, there is really no need to use anything other than an LED panel. While these do allow the light to be a fair bit closer to the canopy than, say, a traditional HID setup.
We are not going to go into the specifics of light-to-canopy distance right here, right now, as there is no one golden rule here. The light will need to be a little further away from immature seedlings and plants in early vegetative growth than further down the line, but the actual perfect distance changes from light to light, so you will need to do a little research of your own to work that out.
But, the Sirius Limbo technique aims to keep the canopy at one uniform height to ensure the budding sites all sit in the perfect ‘goldilocks’ region.
Oh, and the ‘Sirius’ part of the name literally comes from the fact that this method was popularised by a grower going by the moniker “Sirius”. Actually, he credits a friend, ‘Nebular’, with the creation of the method – but it stuck with his name, either way.
First things first. Topping.
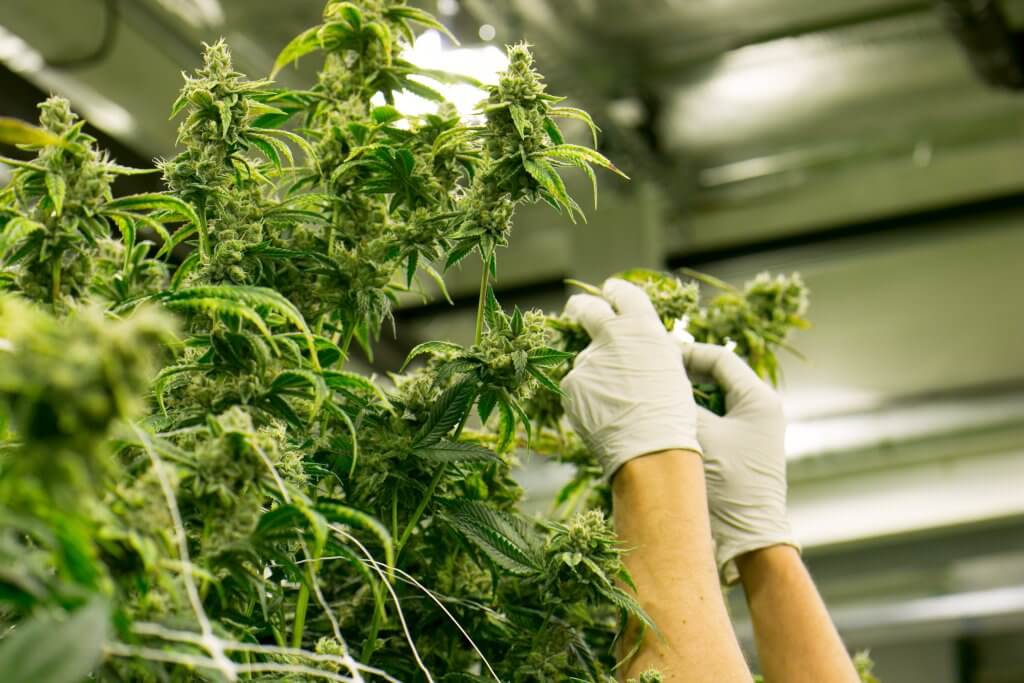
You will want to wait until the plant has developed four to seven nodes before you start topping (a node is the ‘joint’ in the main stem where the branches will grow from). By carefully cutting the crown above the fourth to seventh node (we usually top after the fifth node has developed), you force the plant into redirecting its efforts into the two branches that have just started to develop underneath the cut. These become the main stems, doubling the number of top colas.
You can top the plant as many times as you like, but keep in mind that every time you top the plant there will be a period of at least slightly stunted growth which will last anywhere from around 5 to 14 days. The cleaner the cut, the better chance of the plant bouncing back quickly. You will also want to wait until the two branches have reached around the same height as the original crown before topping again.
Once you are done with the topping (or possibly during the topping cannabis process, depending on how many times you intend to top), it’s time to start tying down the branches while also employing some super-cropping. You want to super-crop sparingly, as this puts the plant under heavy stress – and it has already been through the wringer with the topping. The idea is to tie the branches down so the canopy stays at one, nicely spread out height.
If any branch gets a little out of line or unruly, it’s time to limbo that sucker. Give the branch a nice, firm pinch until you feel a slight pop. That’s a sign that the internal structure has given way, which will induce the plant to focus a lot of its energy repairing itself, and in the process increase the vigor of the entire branch, be careful though, you really do not want to overdo this. If you do get a little carried away, you can wrap the break up in some tape and pray to ‘the old gods and new’ that you haven’t gone too far.
Keep in mind, you can use this method with an autoflowering strain, but only one that you have a full understanding of. Thanks to the fact that they are not controlled by light timing but instead by their internal genetic timer, autos only stay in the veg growth stage for around 3 to 4 weeks, which means they just don’t have the time to bounce back from the injury before flowering growth begins, unlike photoperiodic strains.
Offers
This product is not for use by or sale to persons under the age of 18. This product should be used only as directed on the label. It should not be used if you are pregnant or nursing. Consult with a physician before use if you have a serious medical condition or use prescription medications. A doctor’s advice should be sought before using any hemp products. All trademarks and copyrights are property of their respective owners and not affiliated with nor do they endorse this product. These statements have not been evaluated by the FDA. This product is not intended to diagnose, treat, cure or prevent any disease. By using this site you agree to follow the Privacy Policy and all Terms & Conditions printed on this site. All products contain less than 0.3% Cannabinoid-compliant with applicable Federal Laws. Please make yourself aware of any and all applicable laws regarding hemp in your jurisdiction. Premium Cultivars accepts no liability or responsibility regarding germination laws in any specific locale state or national jurisdictions.THCA products are not available for shipment to the following states: Hawaii, Idaho, Minnesota, Oregon, Rhode Island, Utah, Vermont *Note: Products with Total THC content above 0.3% must not be shipped to these states.
We want to help you get your hands on the seeds you want, take 20% off your next purchase when you enter your email below!
We want to help you get your hands on the seeds you want, take 20% off your next purchase when you enter your email below!